
 A powerful golf swing comes from a strong base of support and distributing the force and movement through as many different segments of your spine as you can. Just like the old adage says “many hands make light work”. These five Pilates exercises will decrease your likelihood of injury and increase the power in your swing, helping to improve your drive.
Pass this article onto your golf loving clients. This is a (pre) Pilates home exercise program they can follow with ease.
BRIDGING Start Position: Lie on your back with knees bent and feet in line with your hip bones, arms long by your side (palms down). The Exercise: Start by rocking the pelvis along the mat. Imagine your pubic bone curling up towards your nose but do not lift your hips off the floor yet. Reverse the movement so that your pubic bone reaches out towards your feet. Do this with the least amount of effort possible. You will notice that your spine will change from a flattened spine to an arch (don’t go so far that your back feels squashed).

 Once you have done a few repetitions, progress the movement by curling the pubic bone towards you and then allowing your hips and back to roll off the floor. Keep your pelvis slightly tilted at the top of the movement. Your aim is to create a long, straight diagonal line from your armpit to your knee. Roll your spine back down to the floor noticing how many segments of your spine are coming down onto the mat. Your aim is to get as many segments moving as possible.
 The Benefit: Bridging will get your spine moving in as many segments as possible in a familiar direction. It will also strengthen your legs and glutes and improve your breathing.
Number of Reps: 4-6 small tilting movements. 6-8 full bridges
The Benefit: Bridging will get your spine moving in as many segments as possible in a familiar direction. It will also strengthen your legs and glutes and improve your breathing.
Number of Reps: 4-6 small tilting movements. 6-8 full bridges
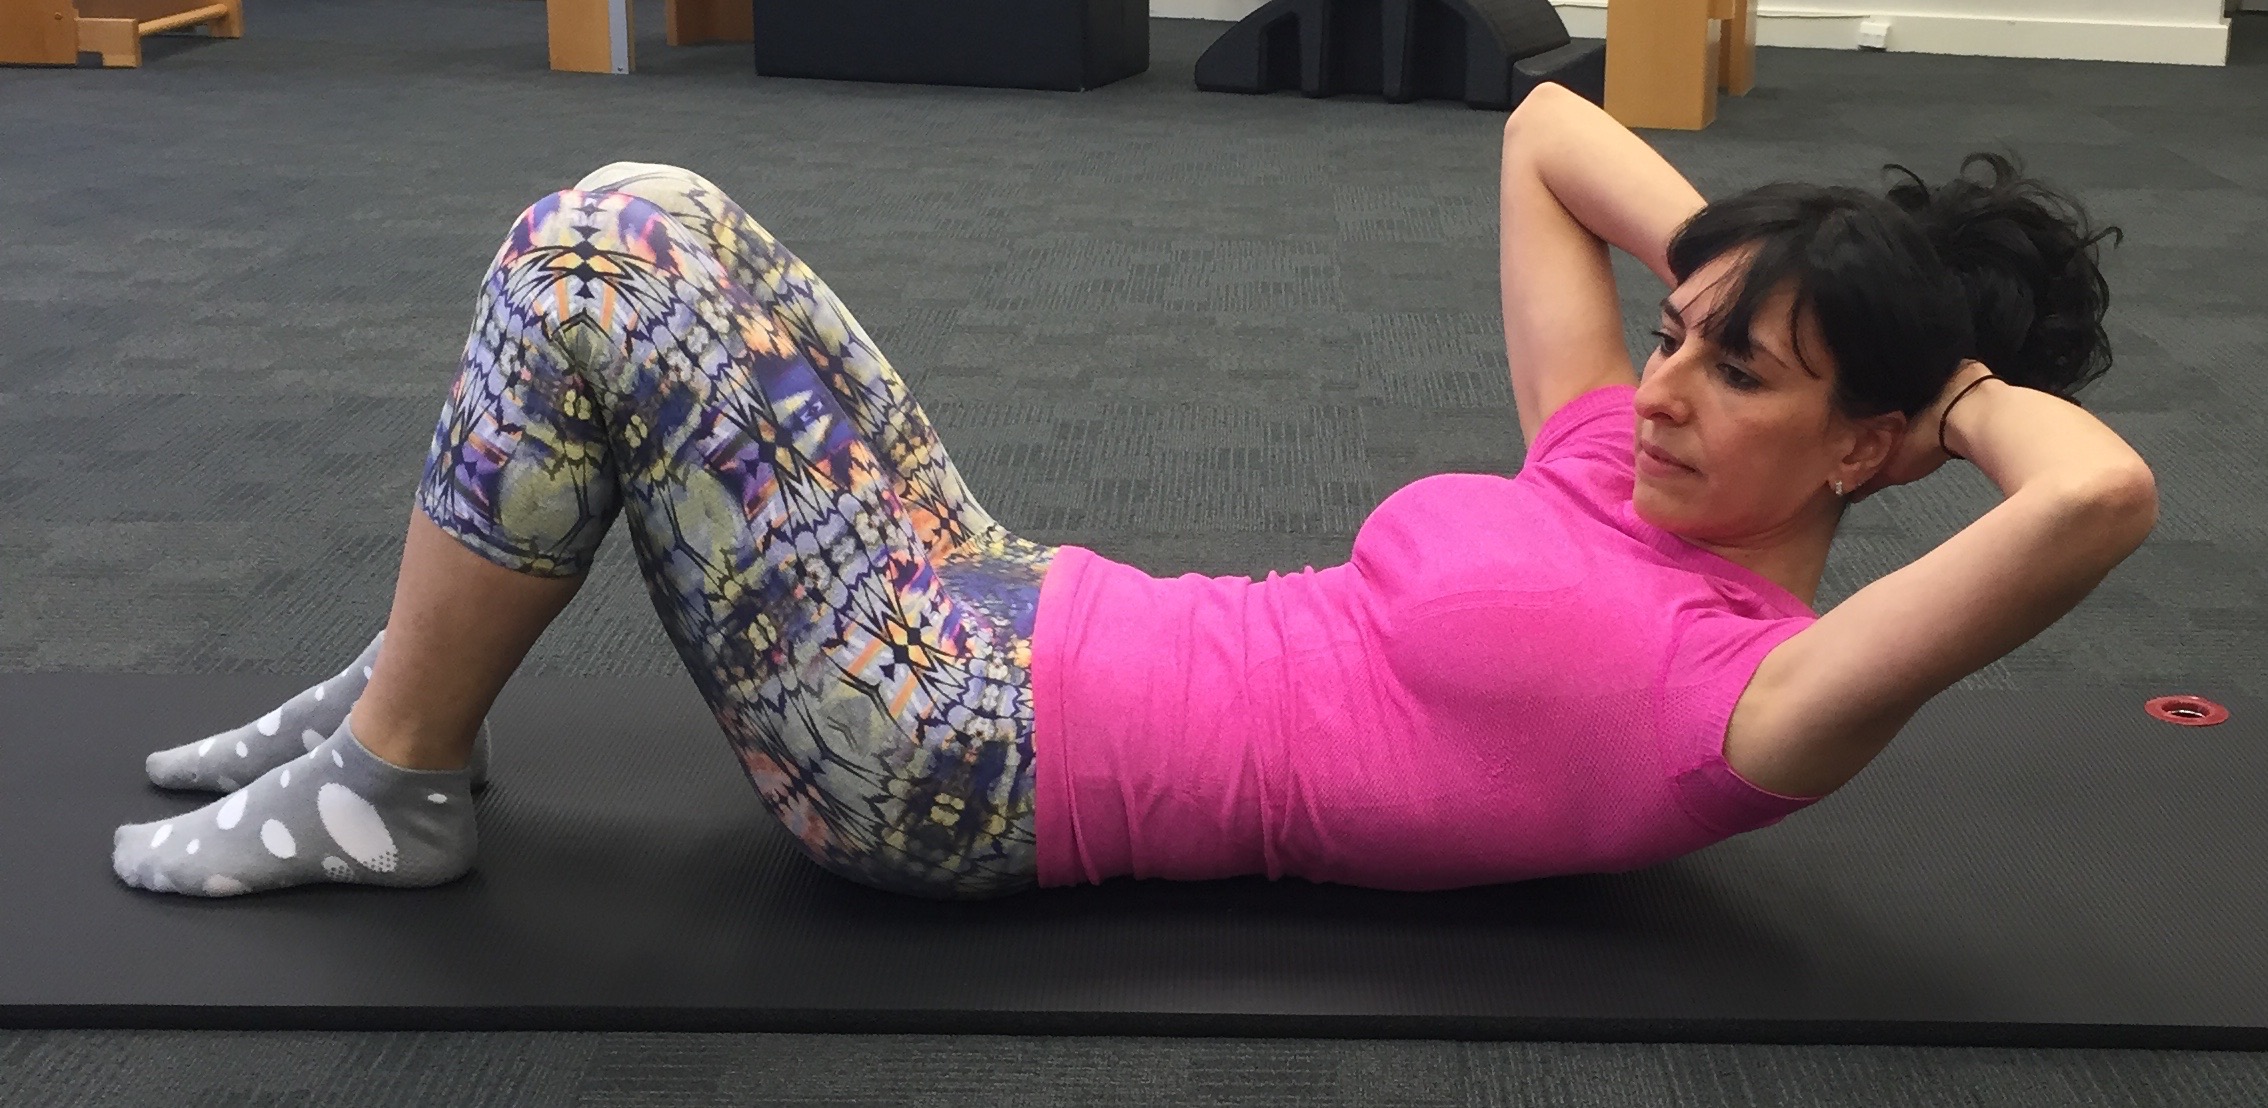
CHEST LIFT WITH ROTATION Start Position: Lying on your back as above. Interlace your fingers and place them at the back of your head. You should be able to see your elbows out of the corners of your eyes. The Exercise: Breathe out to curl the upper part of your back off the mat, only as far as you can keep your pelvis still (no gripping the bum!) Your feet should be weighted equally and your lower back should feel long and uninvolved.
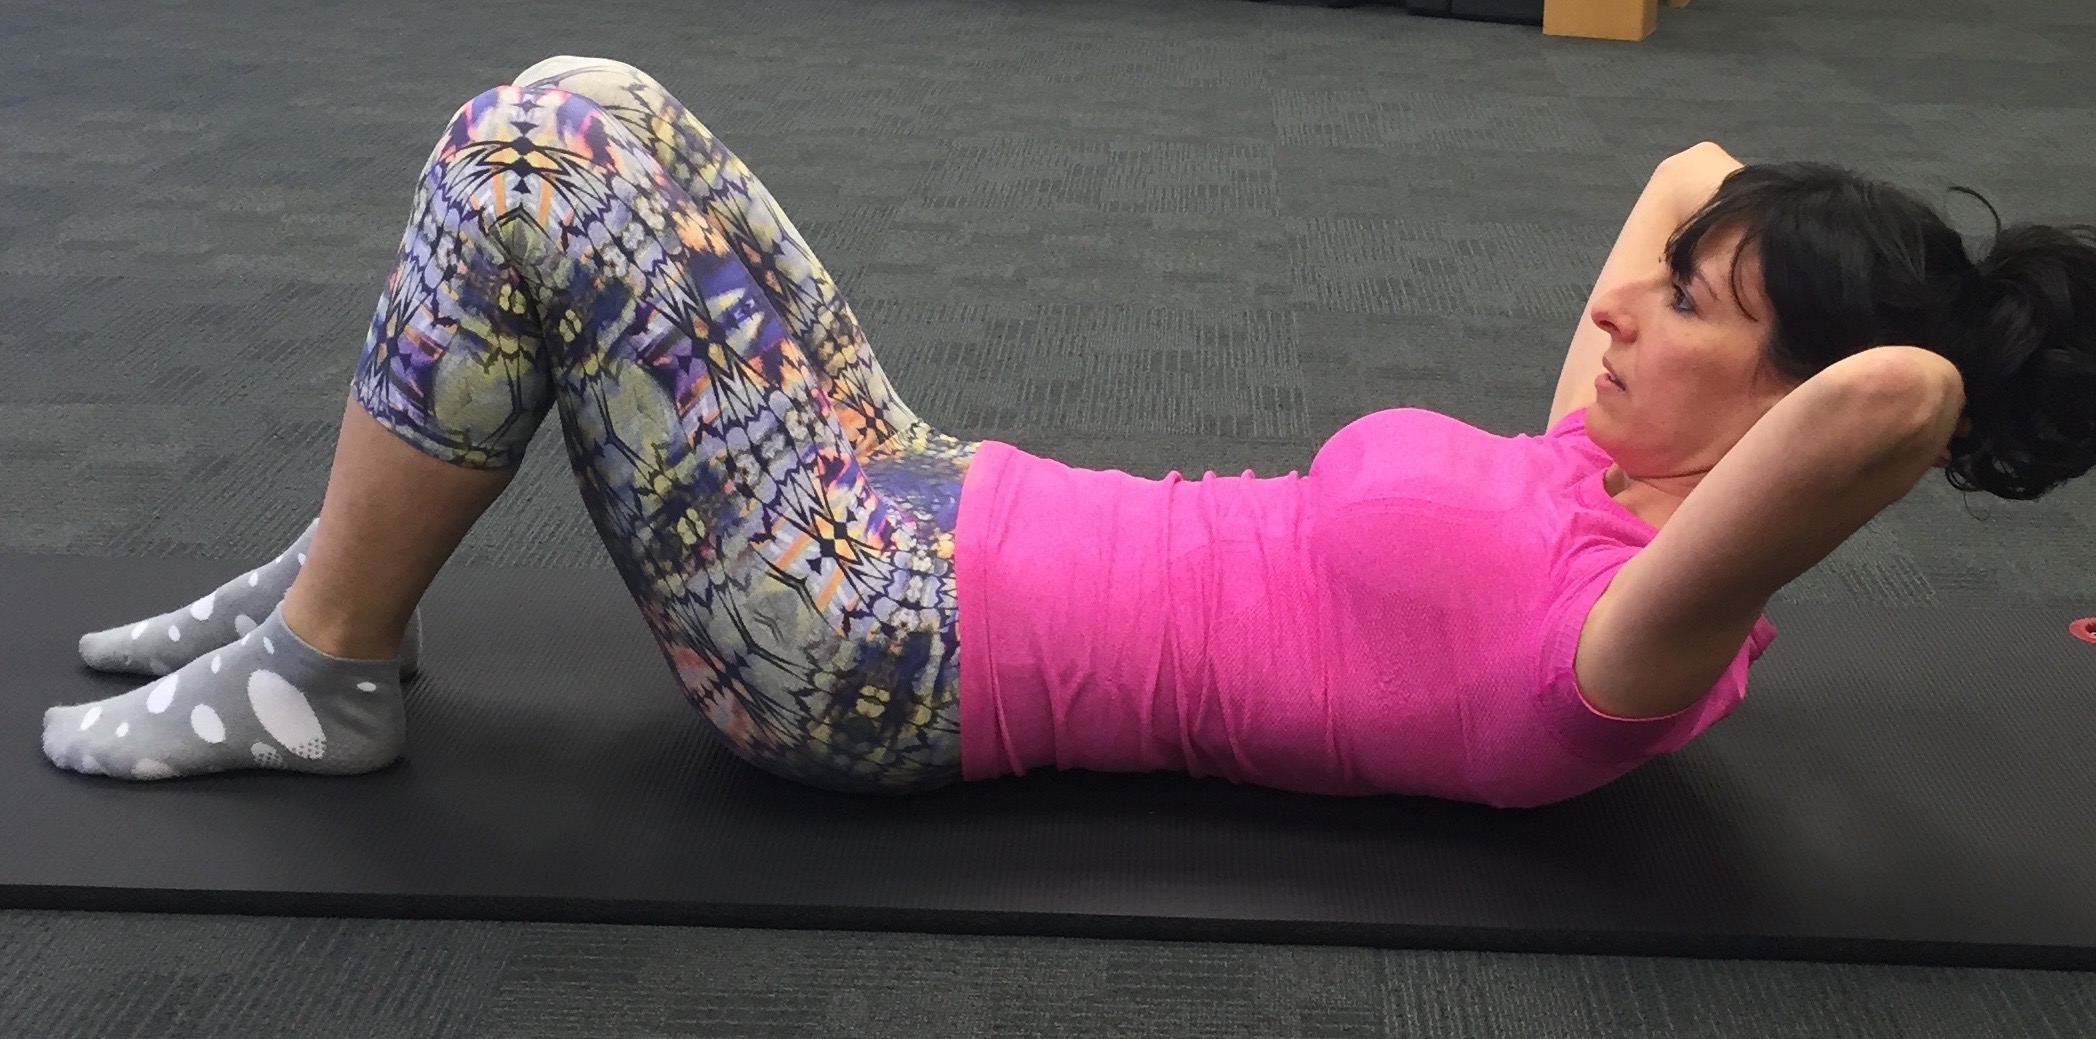 Pausing, take a breath in and imagine your upper back inflating like a balloon. As you breathe out, keep your curl and twist your breastbone towards your right knee. Breathe into your upper back to return to the centre. Breathe out as you rotate to the left. Breathe in to return to the centre and then lie down.
 The Benefit: It will teach your body to keep the hips stable and get a twisting motion in your upper back only. It strengthens your oblique abdominals, the muscles responsible for twisting the trunk.
Number of Reps: 6 rounds
The Benefit: It will teach your body to keep the hips stable and get a twisting motion in your upper back only. It strengthens your oblique abdominals, the muscles responsible for twisting the trunk.
Number of Reps: 6 rounds
SIDE TO SIDE Start Position: Lying on your back, with your knees and feet pressed together. Arms out long on a 45 degree angle, palms down. The Exercise: Imagine your pelvis like a wheel. Breathe in as you peel your right buttock and foot off the mat, imagine your right hip bone going up and over while your left hip bone goes down and around. Feel the twist of your lower spine while your chest and shoulders remain square on the ground. Keep your hips level.
 Breathe out as you return your ribs, lower back and pelvis to the start position on the mat. Repeat to the other side.
The Benefit: Encourages movement in your lower spine while stabilising your shoulders and upper back. This is a progression of the bridging exercise as it incorporates twisting.
Number of Reps: 6 to each side
Breathe out as you return your ribs, lower back and pelvis to the start position on the mat. Repeat to the other side.
The Benefit: Encourages movement in your lower spine while stabilising your shoulders and upper back. This is a progression of the bridging exercise as it incorporates twisting.
Number of Reps: 6 to each side
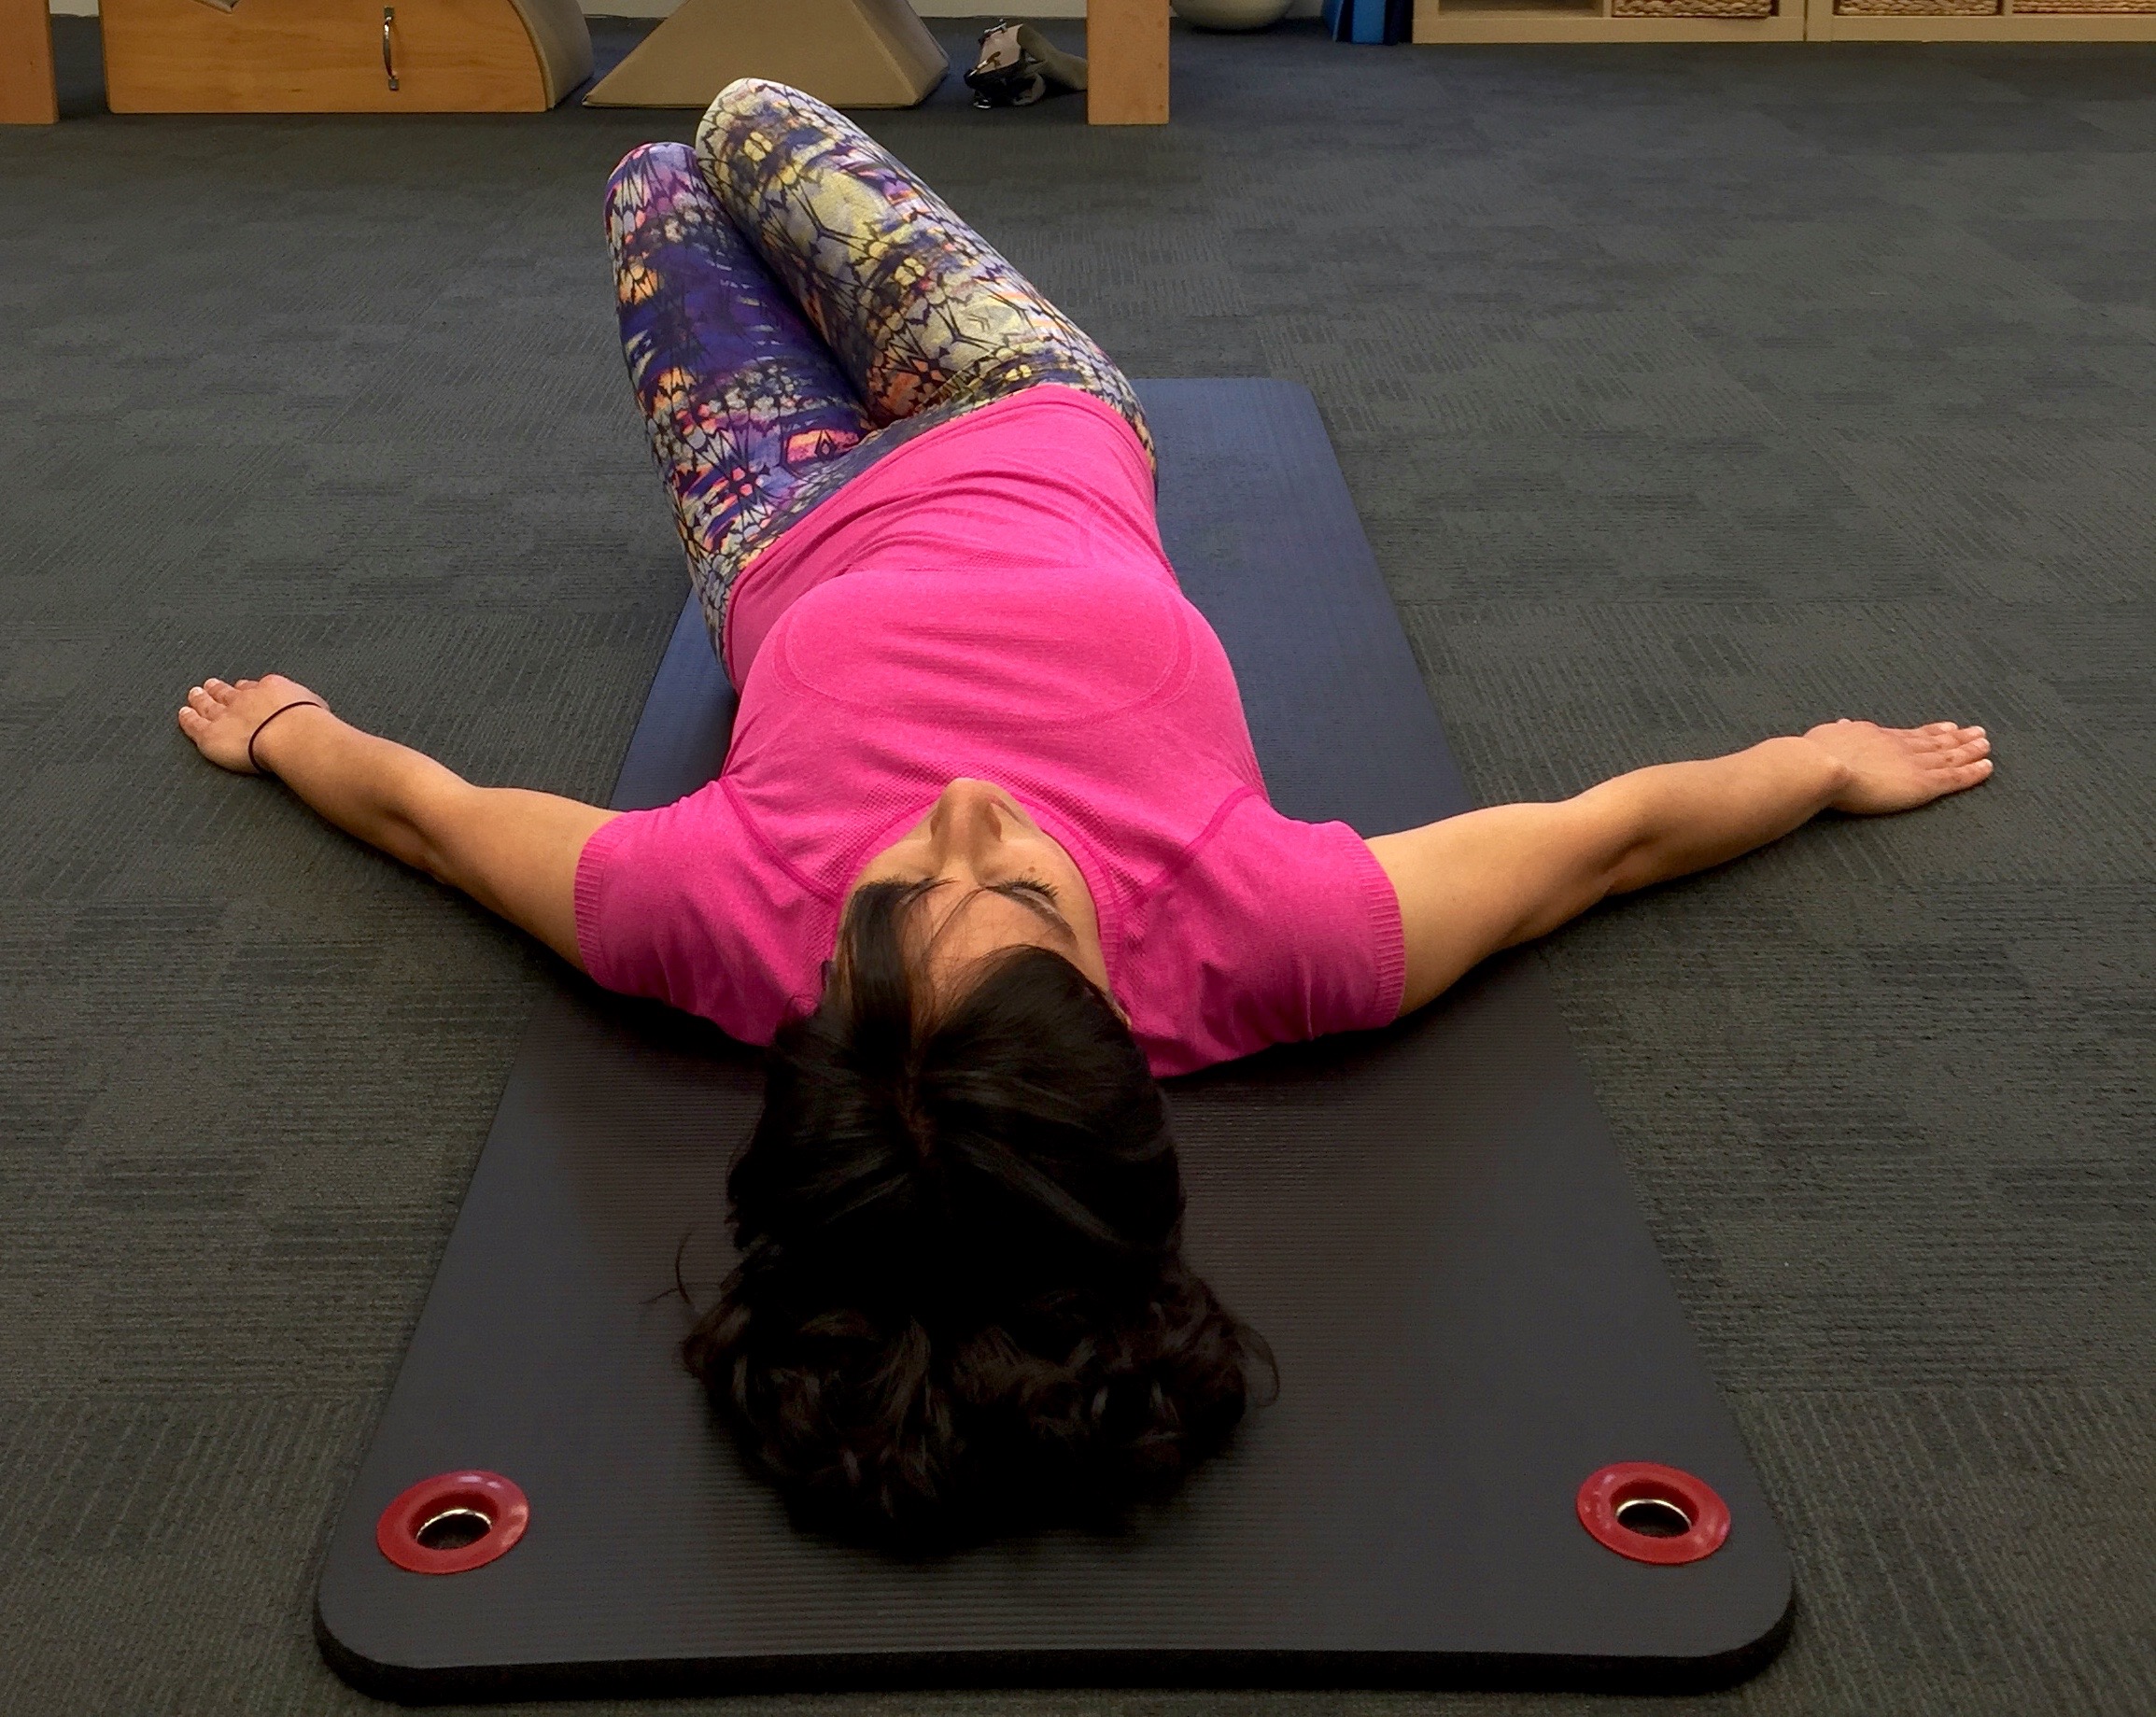
BOOK OPENINGS Start Position: Lying on your side, interlace your hands and place them behind your head. Stack your knees on top of each other (you might feel more comfortable with a cushion between your knees). Keep your spine long and your head in line with your upper back. The Exercise: Lift your top arm only as far as you can still see your elbow out of the corner of your eye. Keep your head heavy in your hands and turn your gaze along the ceiling. Allow your body to follow your head until your breastbone faces up towards the ceiling. Use the lower abs gently to keep the hips stacked and still- no twisting in this part of your body. Stay in this position for a few breaths. Reverse the movement rotating the spine back to the start position and allow your elbow to fall back onto the head to finish.
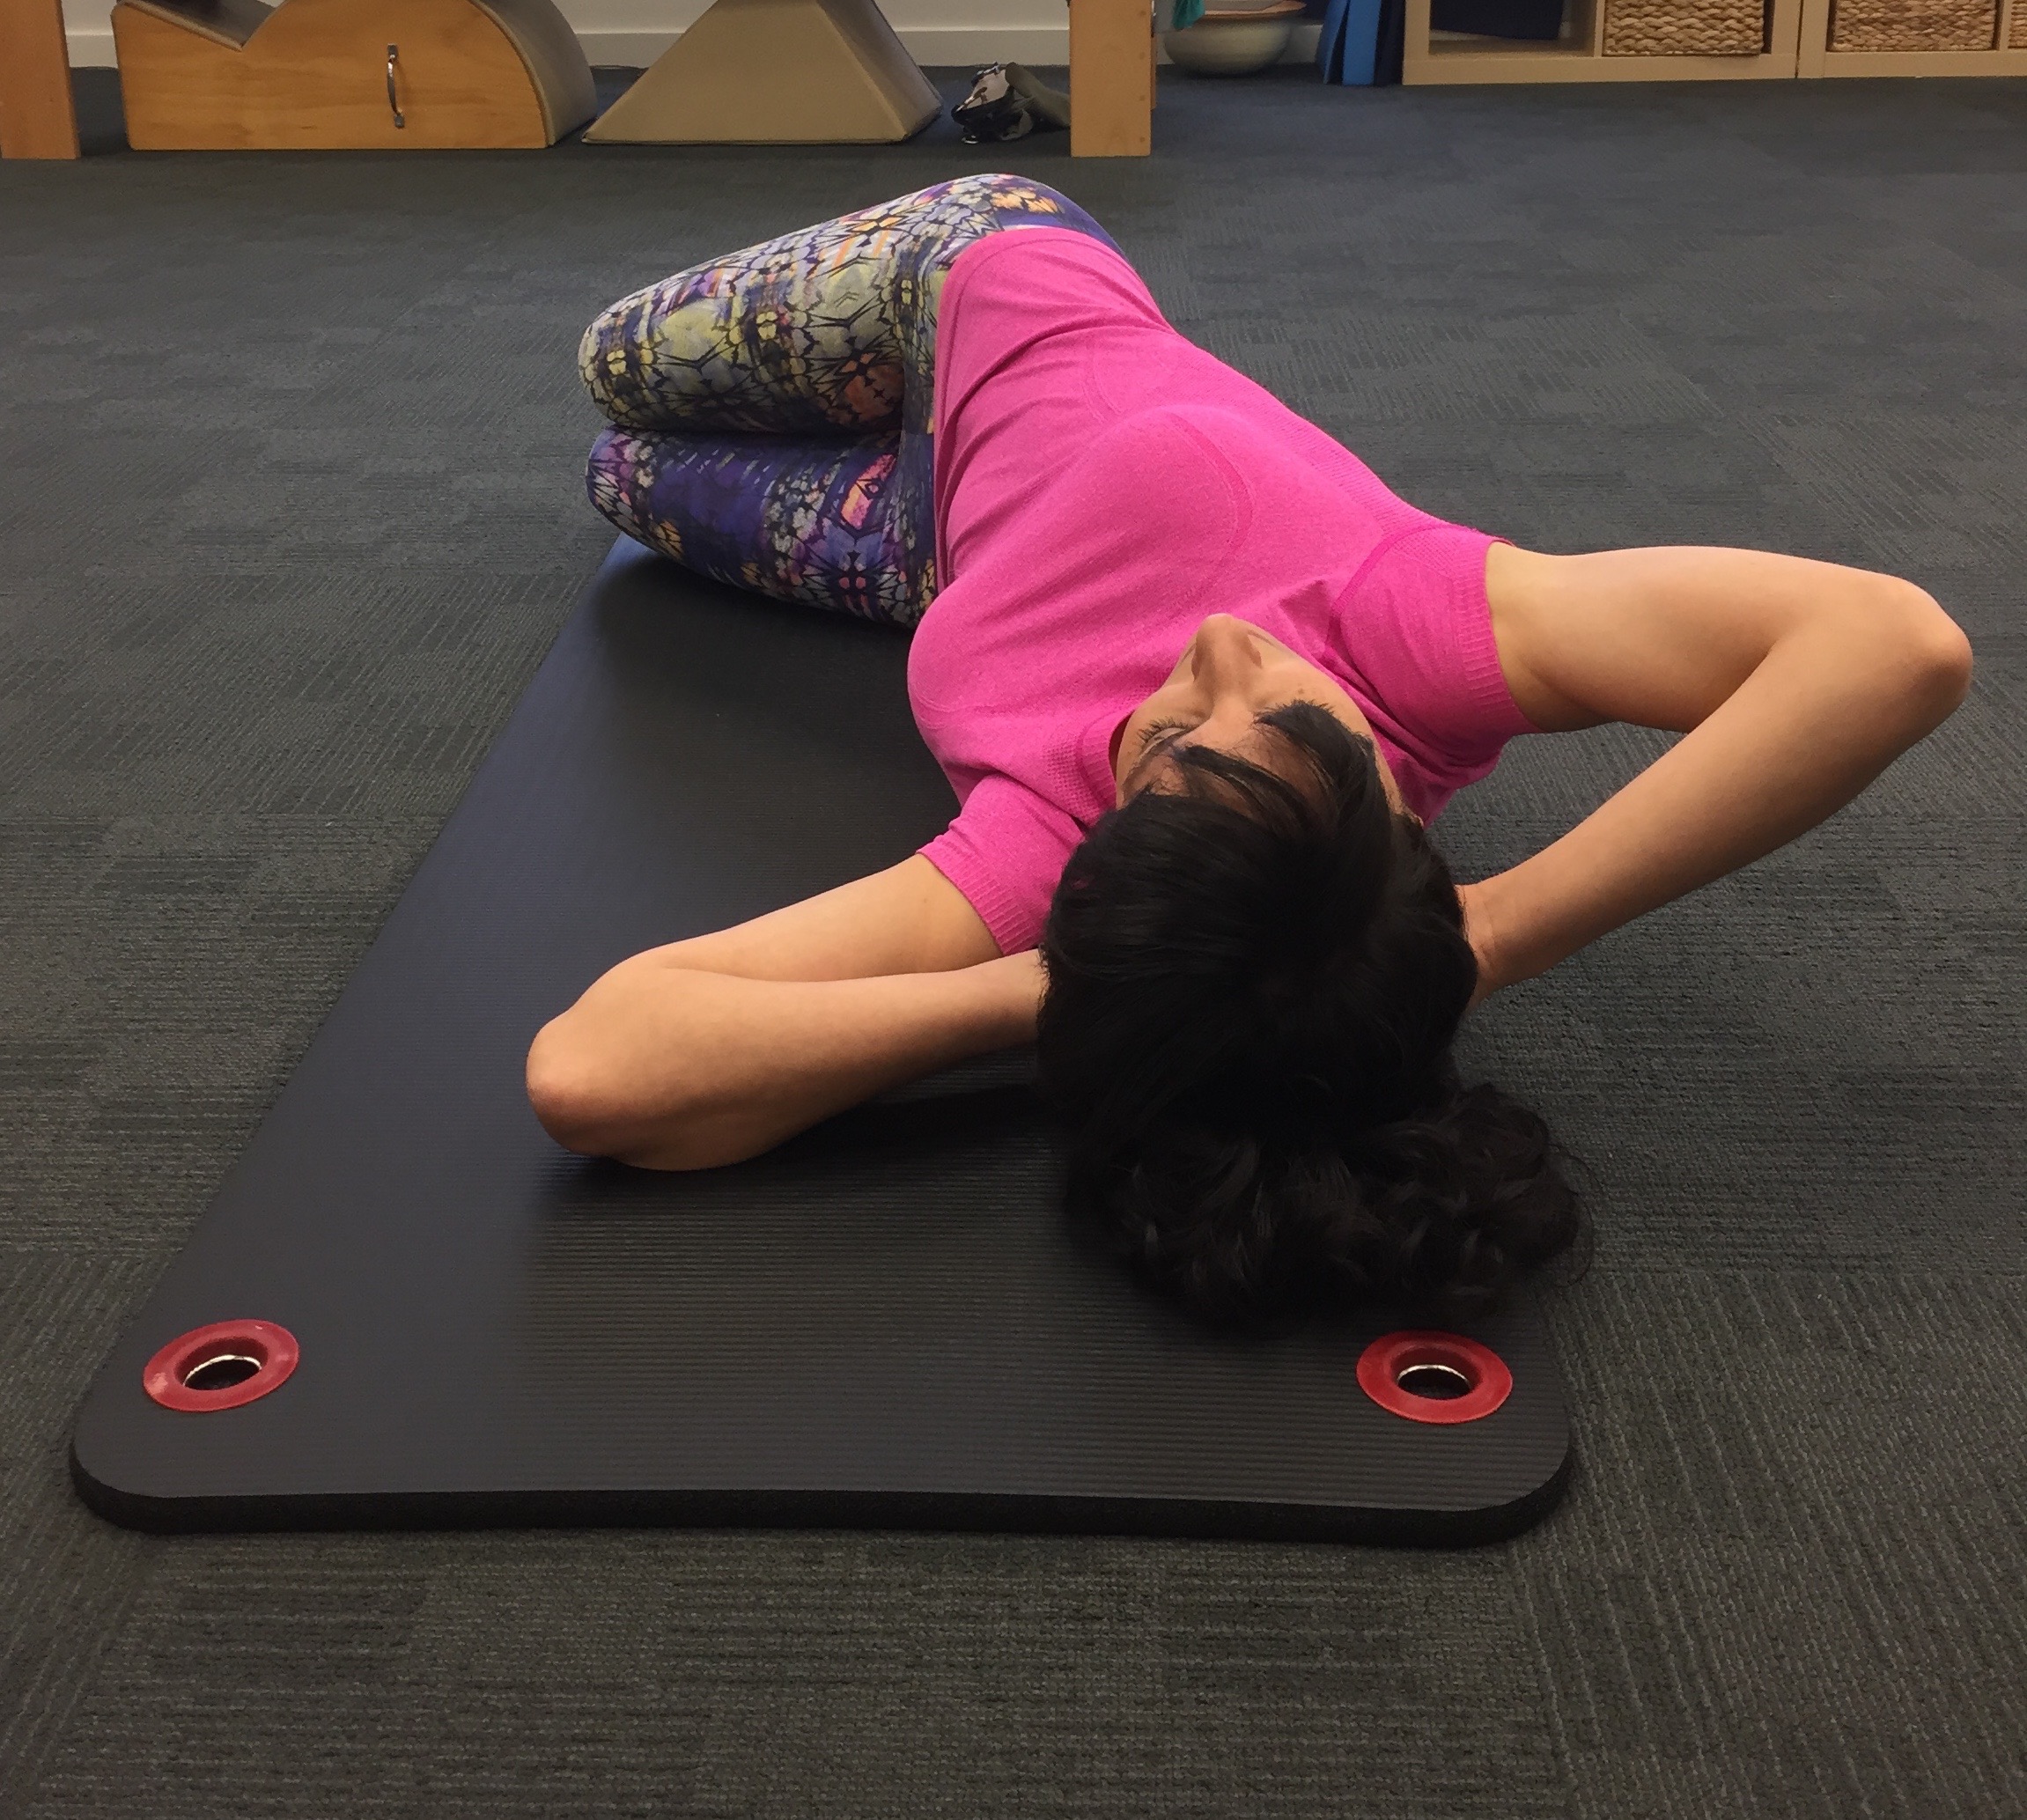 The Benefit: A great stretch that uses gravity and your body weight to encourage rotation in your spine. Gets your lower abs working to stabilise your hips while moving the opposite part of your body.
Number of Reps: 4-6 to each side
The Benefit: A great stretch that uses gravity and your body weight to encourage rotation in your spine. Gets your lower abs working to stabilise your hips while moving the opposite part of your body.
Number of Reps: 4-6 to each side
SIDE LYING HIP CIRCLES Start Position: Lying on your side with either your bottom arm under your head or a towel. The other hand rests on the floor in front of your chest. Bottom leg bent at 90 degrees, top leg straight and lifted to hip height. The Exercise: Flex your ankle and reach your heel to the far side of the room. With an imaginary marker taped to the inside of your heel, draw ten small circles one direction and then reverse. Keep the circle balanced so that the centre point is your hip. Keep the rest of your body very still while moving the leg.
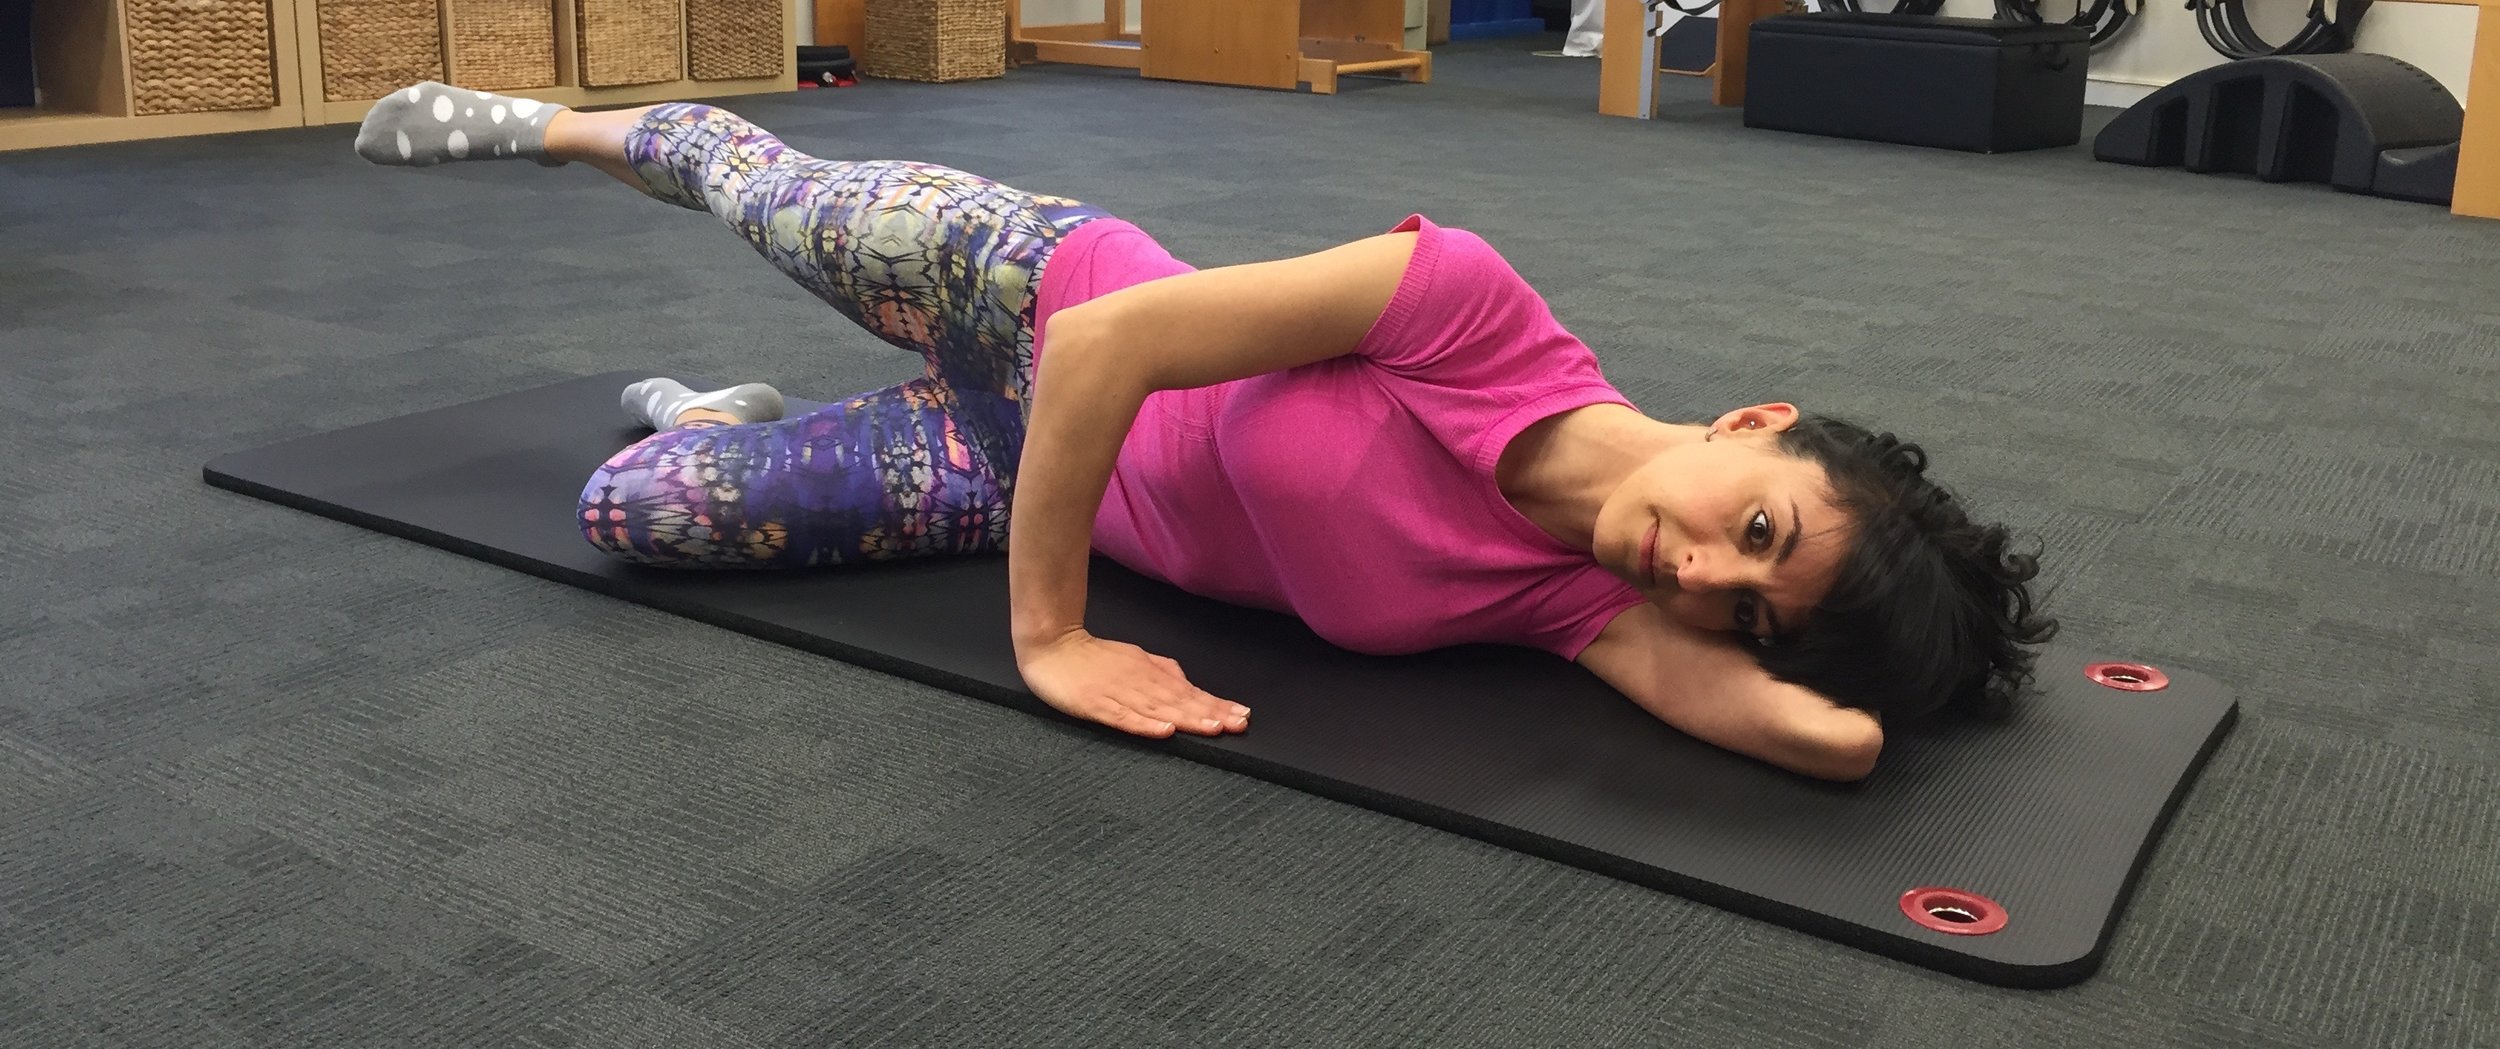 The Benefit: Will strengthen your hips and stabilise your pelvis.
Number of Repetitions: 1 set (both directions) each leg
The Benefit: Will strengthen your hips and stabilise your pelvis.
Number of Repetitions: 1 set (both directions) each leg
Of course these exercises might be far too basic for your clientele but they are a good starting point and will ensure that they cover most of the important movements their golf game will require of them. Your life as the instructor will be made so much more exciting with the more challenging repertoire you will then be able to program!